Let’s be real: most home gym guides either assume you’ve got a garage and $5,000 to spend or they drown you in vague “just start small!” advice that leaves you staring at a yoga mat in your living room, wondering what’s next.
You don’t need a fortune. You don’t need a spare house. What you do need is a clear, step-by-step plan that matches your space, goals, and actual bank account.
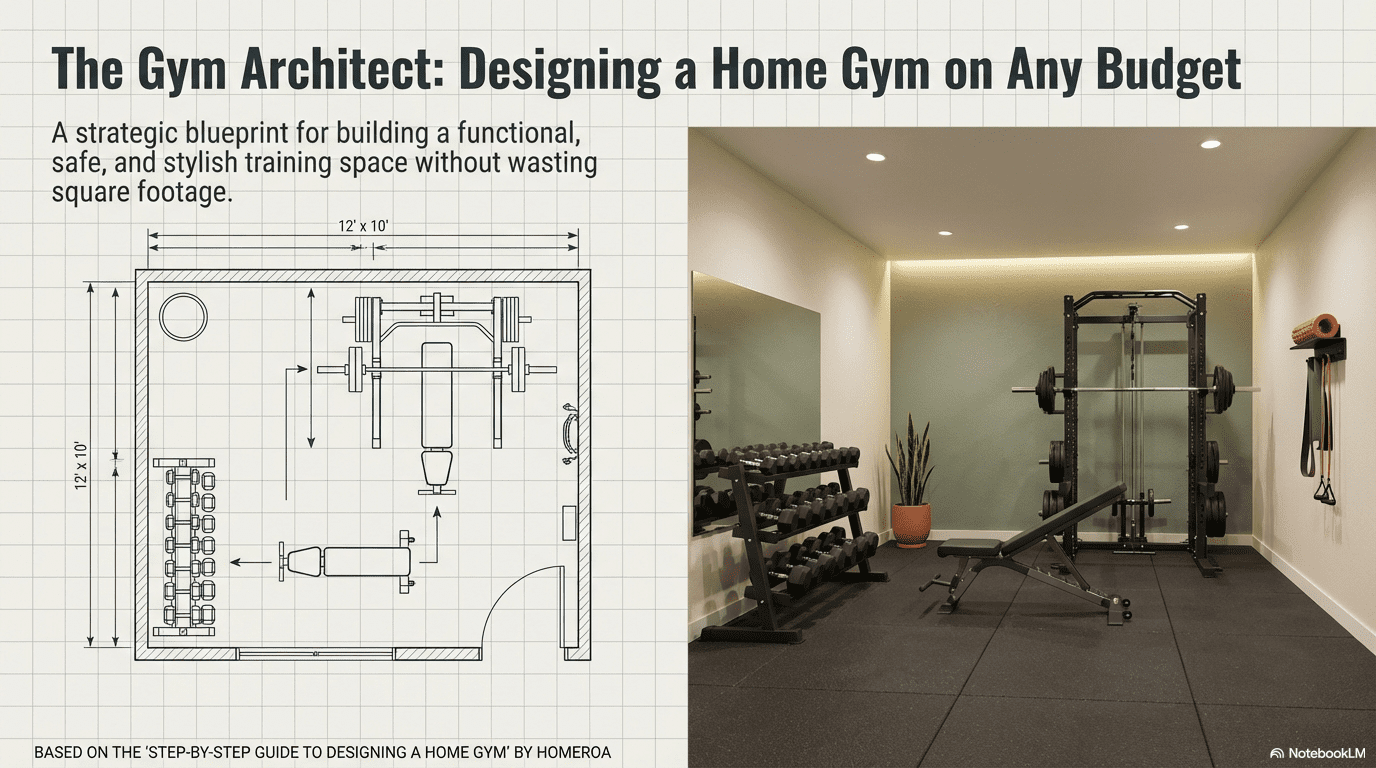
This guide cuts through the fluff. Whether you’re working with a walk-in closet or a basement, $200 or $2,000, you’ll learn how to design a functional, safe, and even stylish home gym—without regret-buying gear or wasting square footage.
And yes, we’ll cover the stuff no one talks about: how to keep it quiet in an apartment, what flooring actually survives deadlifts, and how to make it look like part of your home—not a dungeon.
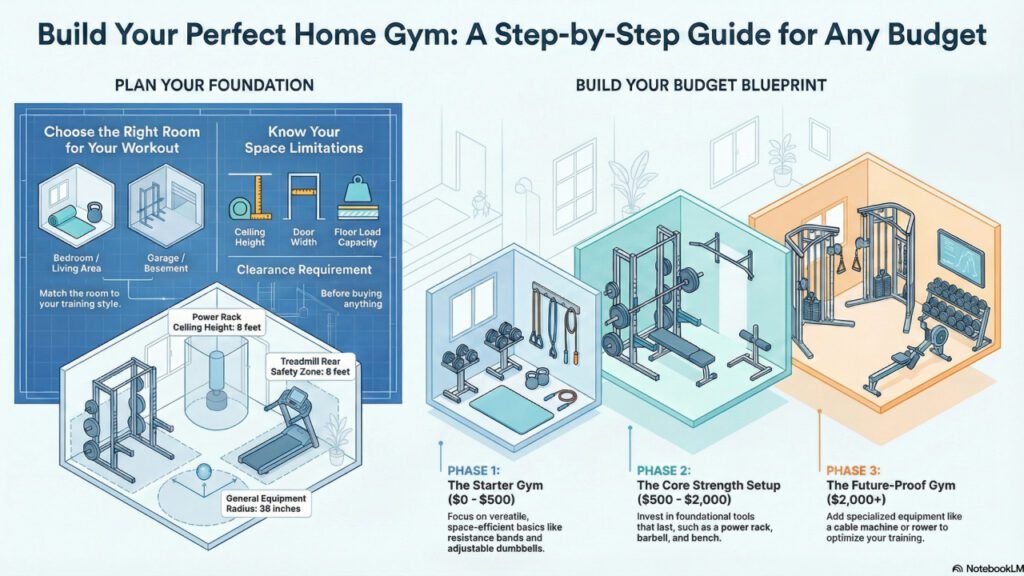
Plan Your Home Gym Like a Pro—Before You Buy a Single Piece of Equipment
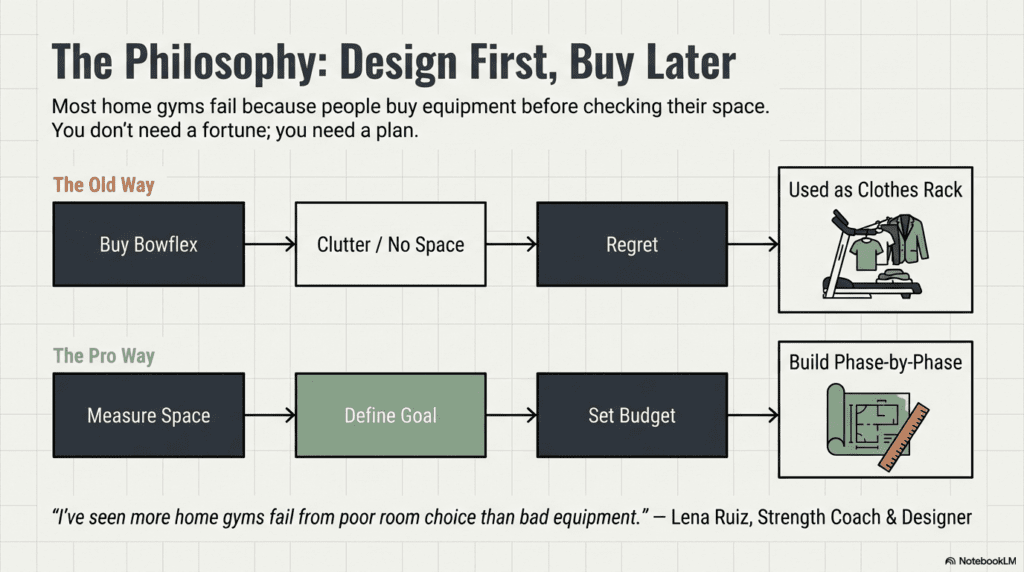
Most people skip this step—and end up with a cluttered corner full of unused gear. The secret? Design first, buy later.
Here’s how to think like a gym architect, not just a shopper.
Choose the Right Room: Basement, Garage, or Spare Bedroom?
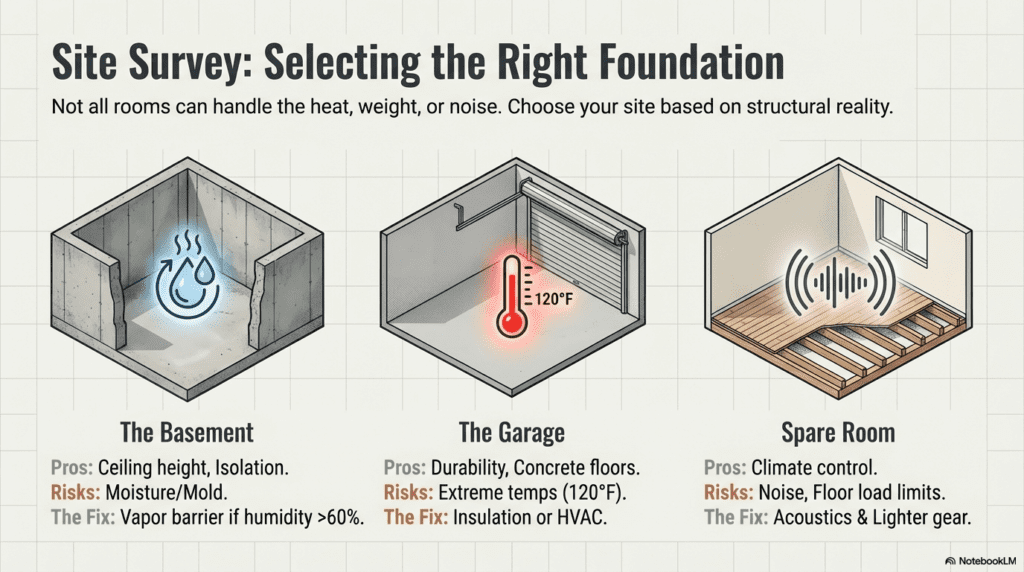
Not all rooms are created equal when it comes to sweat, noise, and heavy iron. Picking the wrong space can lead to mold, noise complaints, or wasted money.
So which room wins? It depends on your priorities.
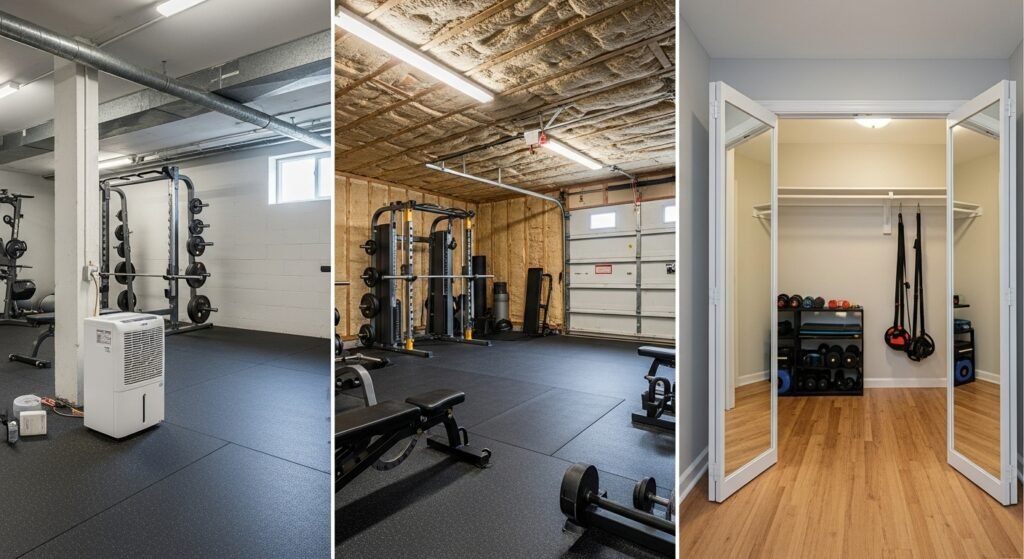
Basements offer great ceiling height and isolation—but watch for moisture and poor ventilation. Always install a vapor barrier under flooring if humidity is above 60%.
Garages are popular for a reason: concrete floors, easy access, and separation from living areas. But uninsulated garages can hit 120°F in summer—making them unusable without HVAC upgrades.
Spare bedrooms or closets work surprisingly well for compact setups—but noise travels upward. If you’re on an upper floor, prioritize acoustic treatment and lighter equipment (think resistance bands over slam balls).
💡 Expert Tip: “I’ve seen more home gyms fail from poor room choice than bad equipment,” says Lena Ruiz, certified strength coach and interior designer. “Match the room to your workout style—HIIT needs ventilation, powerlifting needs floor strength.”
Measure Twice: Space, Ceiling Height & Floor Strength Explained

You wouldn’t build a shelf without checking wall studs—so why buy a squat rack without knowing your floor’s limits?
Minimum clearance matters:
- For a power rack: 8’ ceiling height (to allow pull-ups + overhead pressing).
- For treadmill use: 6’ behind for safety, 3’ on sides.
- Clearance radius: Leave at least 36 inches around all equipment for safe movement.
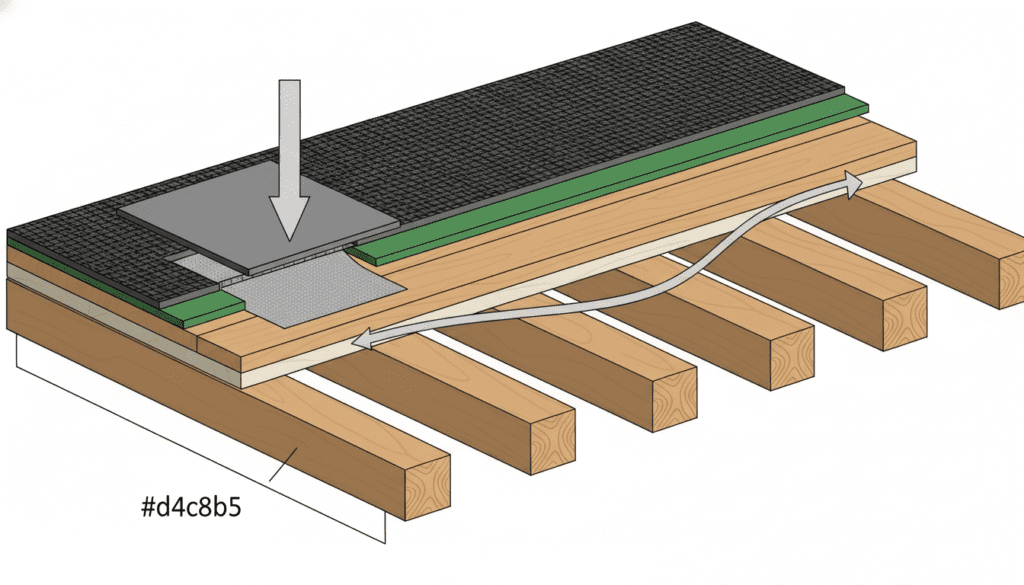
Now, the hidden issue: floor load capacity. Most residential floors handle 40–50 pounds per square foot (psf). A loaded barbell + lifter can exceed 600 lbs—but spread over 4 sq ft, that’s only 150 psf. Problem? Concentrated point loads (like rack feet) can cause floor deflection or joist damage over time.
✅ Fix it: Add ¾” plywood under horse stall mats to distribute weight. In basements, bolt racks directly to concrete.
📏 Pro Workflow:
- Measure room L x W x H.
- Note door width (will your rack fit?).
- Test floor bounce: jump hard—if it sways, reinforce subfloor.
Define Your Fitness Goals—and Match Equipment to Them
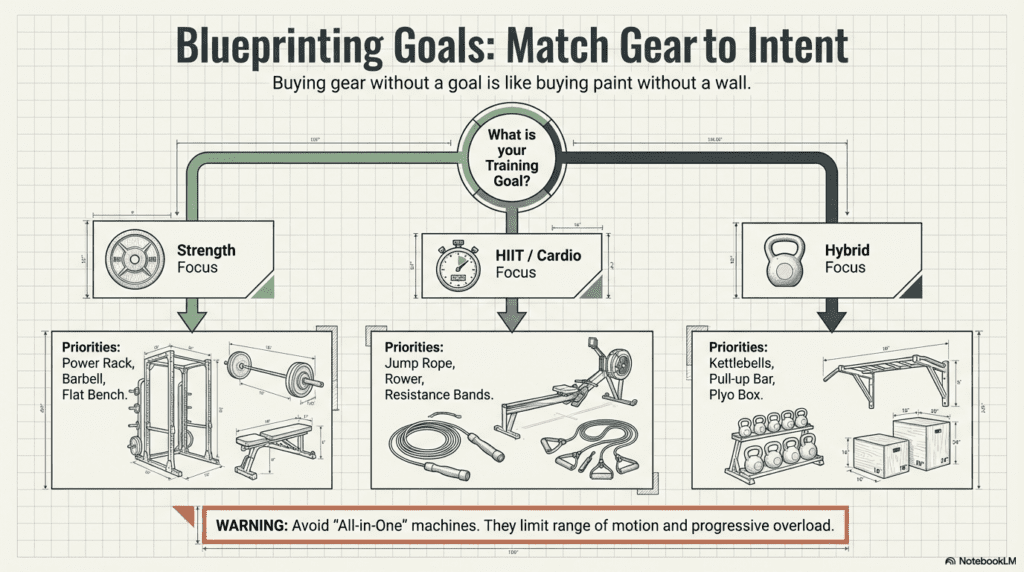
Buying gear before defining goals is like buying paint before choosing a room.
Ask yourself:
- Are you training for strength (barbell focus)?
- General fitness (bodyweight + cardio)?
- Rehab or mobility (yoga, bands, foam rollers)?
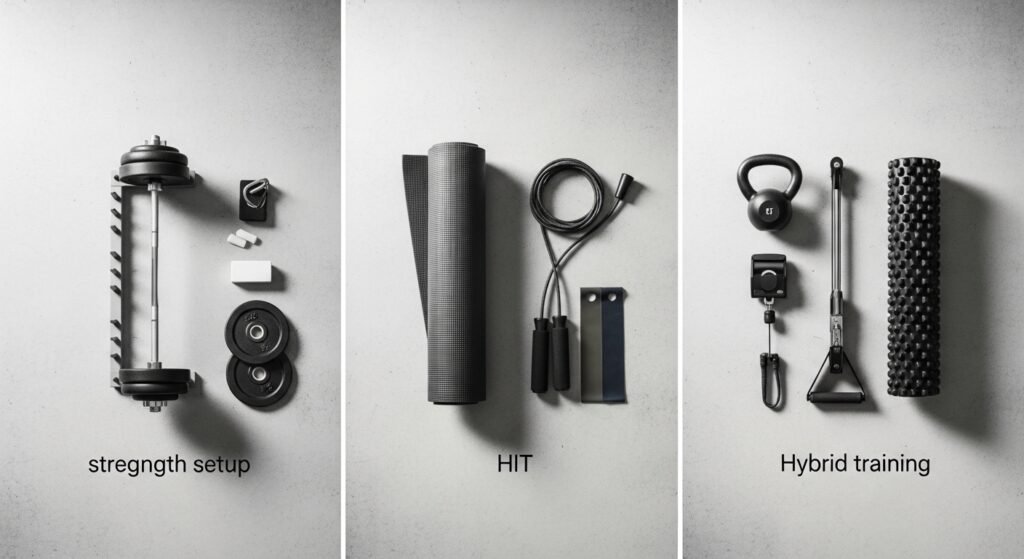
Then match your setup:
Goal | Phase 1 Gear | Phase 2 Upgrade |
|---|---|---|
Strength | Adjustable dumbbells, bench | Power rack, barbell, plates |
HIIT/Cardio | Jump rope, mat, resistance bands | Rower or foldable treadmill |
Hybrid | Kettlebell, pull-up bar | Cable machine, plyo box |
⚠️ Avoid This Mistake: All-in-one gyms (like Bowflex) look space-efficient but limit progressive overload after 6–12 months. They’re fine for beginners—but not for long-term growth.
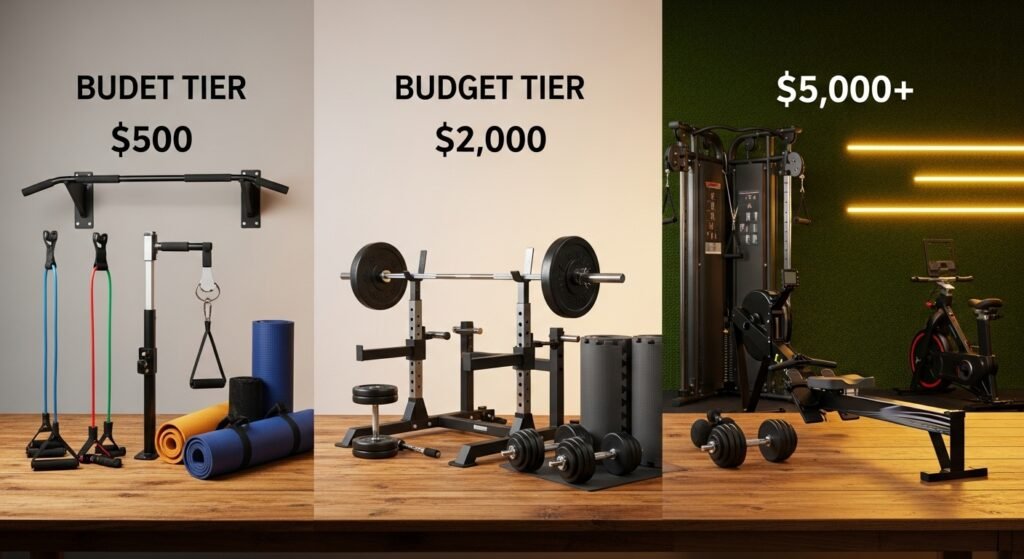
Build Your Budget Blueprint—$500, $2,000, or $5,000+
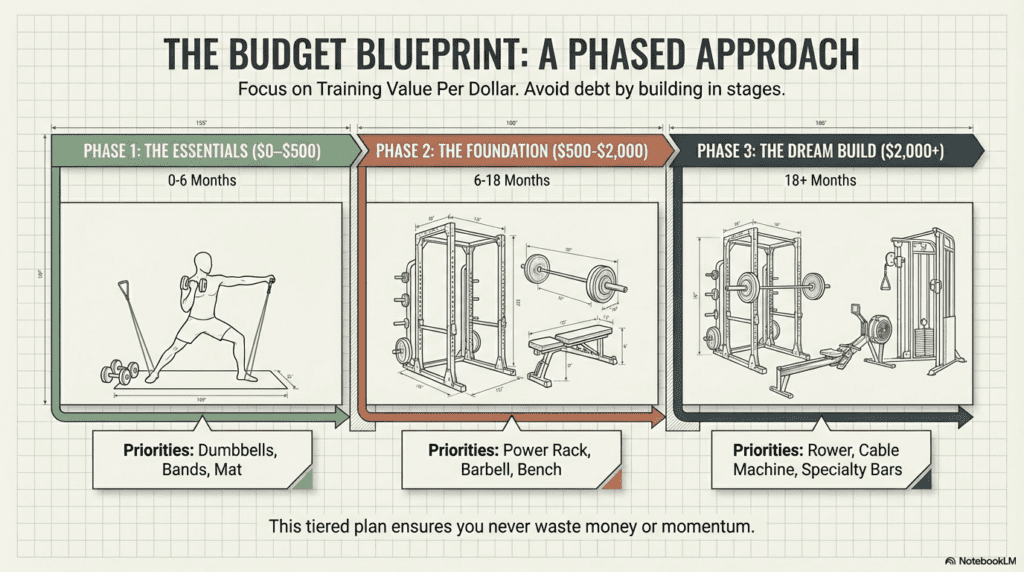
Forget “cheap vs. expensive.” The real question is: What gives you the most training value per dollar—and room to grow?
Most guides stop at gear lists. We go further: realistic timelines, upgrade paths, and 5-year cost of ownership (yes, that includes replacing worn mats and upgrading bars).
Whether you’re starting with $200 or scaling to $5K+, this tiered plan ensures you never waste money—or momentum.
Phase 1 ($0–$500): Bodyweight + Basics That Deliver Results
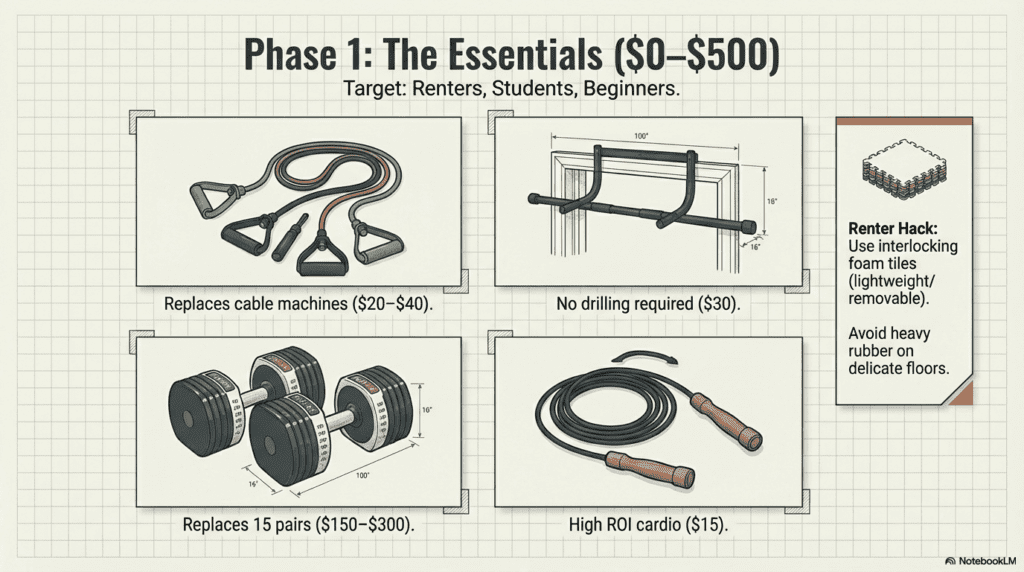
You can build serious strength with less than $500—if you choose wisely.
This phase is for renters, students, or anyone testing the waters. Focus on versatile, non-permanent, space-efficient tools.
Essential Gear List:
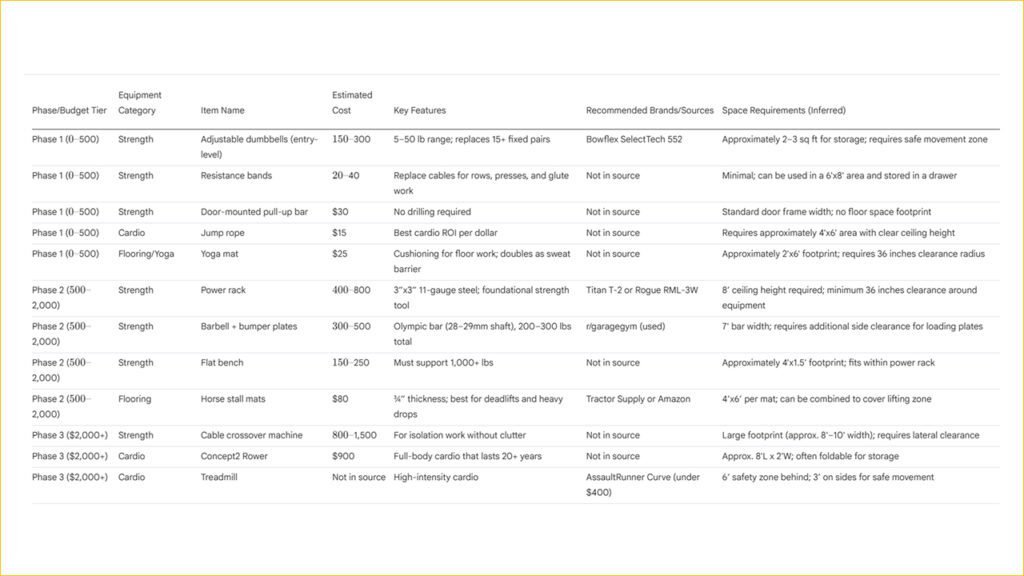
- Resistance bands ($20–$40): Replace cables for rows, presses, and glute work.
- Yoga mat ($25): Cushioning for floor work; doubles as sweat barrier.
- Door-mounted pull-up bar ($30): No drilling required.
- Adjustable dumbbells (entry-level) ($150–$300): Look for 5–50 lb range (e.g., Bowflex SelectTech 552).
- Jump rope ($15): Best cardio ROI per dollar.
🛠️ Renter Hack: Use interlocking foam tiles (not rubber) to avoid floor damage. They’re lightweight, removable, and quiet enough for upstairs use.
💡 Expert Tip: “I trained clients for 2 years with just bands and a pull-up bar,” says Marcus Lee, NASM-certified coach. “Progressive overload isn’t about weight—it’s about tension and time under load.”
Phase 2 ($500–$2,000): Core Strength + Smart Upgrades
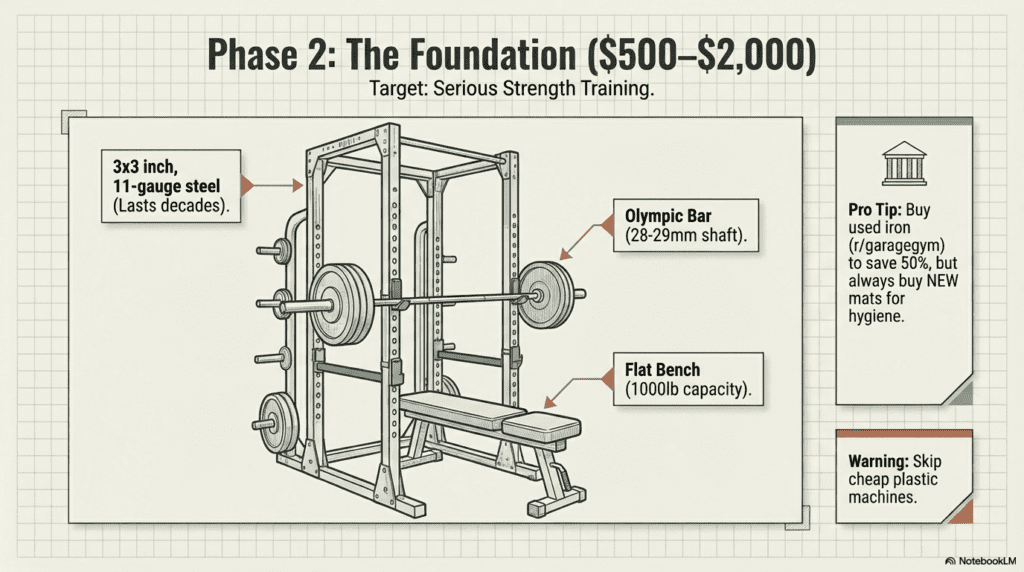
Now you’re serious. This is where you invest in foundational strength tools that last decades—not gadgets that collect dust.
Priority Order:
- Power rack ($400–$800): Look for 3”x3” 11-gauge steel (e.g., Titan T-2 or Rogue RML-3W).
- Barbell + bumper plates ($300–$500): Olympic bar (28–29mm shaft), 200–300 lbs total.
- Flat bench ($150–$250): Must support 1,000+ lbs.
- Flooring: 4’x6’ horse stall mats ($80) or 8mm rubber tiles ($150).
⚠️ Skip the All-in-One: Machines like Bowflex PR1000 limit range of motion and max load. You’ll outgrow them fast.
🔧 Pro Tip: Buy used barbells/racks from r/garagegym. Inspect for bent sleeves or cracked welds—but expect 30–50% savings.
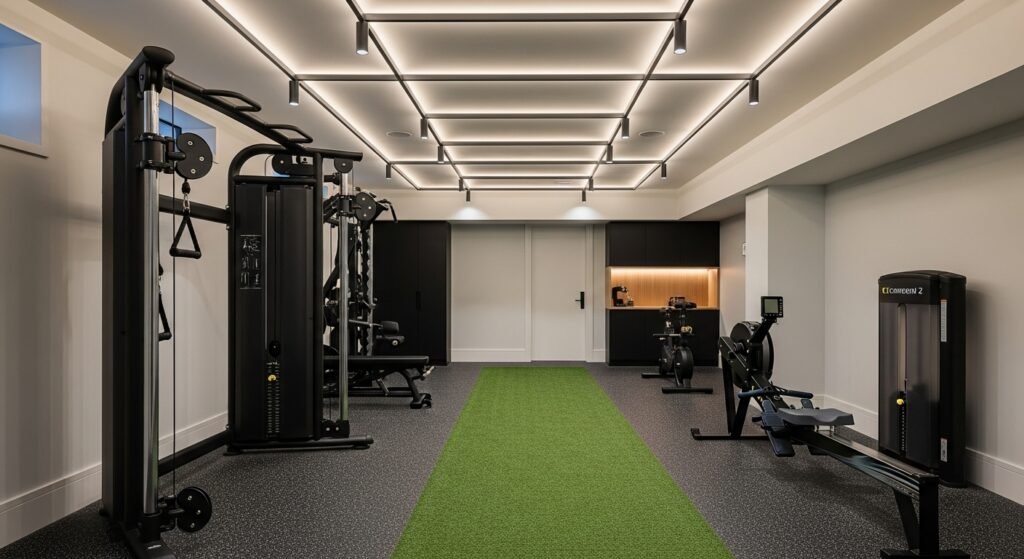
Phase 3 ($2,000+): Full Customization & Future-Proofing
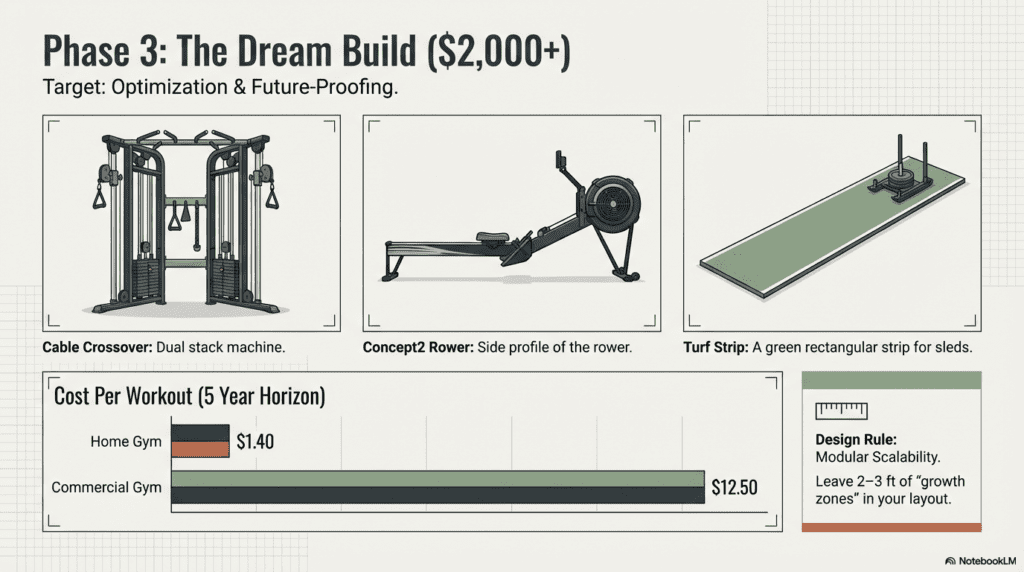
You’ve got the foundation. Now it’s time to specialize, optimize, and scale.
High-Value Add-Ons:
- Cable crossover machine ($800–$1,500): For isolation work without clutter.
- Concept2 Rower ($900): Full-body cardio that lasts 20+ years.
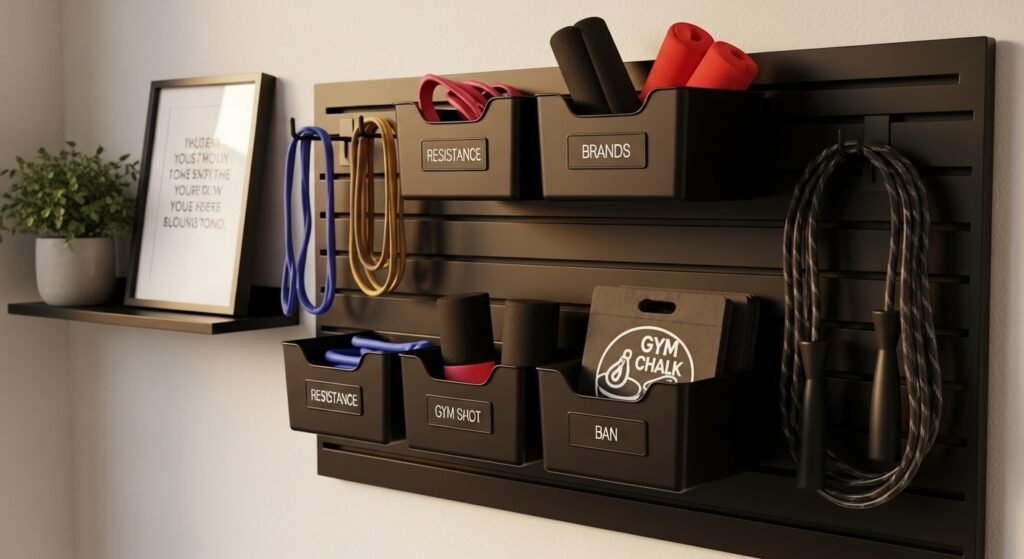
- Wall-mounted storage: Keep floors clear and organized.
- Turf strip ($200): For sled pushes or battle ropes.
- Smart lighting: Tunable white LEDs (3000K–5000K) to match energy levels.
🔄 Modular Scalability: Design your layout so new gear slots in without rearranging everything. Leave 2–3 ft of “growth zones.”
🏷️ Long-Term Math: A $3,000 gym used 4x/week = $1.40 per workout over 5 years. Gym membership? $100/month = $12.50/workout.
Design for Function, Safety & Style—Not Just Equipment
A home gym shouldn’t feel like a storage unit for iron. The best setups blend performance, safety, and aesthetics so you actually want to walk in every day.
Most guides treat design as an afterthought—throwing up a mirror and calling it done. But smart choices in flooring, lighting, color, and acoustics directly impact your workouts, recovery, and even your motivation.
Let’s fix what the others miss.
Flooring Face-Off: Rubber, Foam, Turf & Beyond
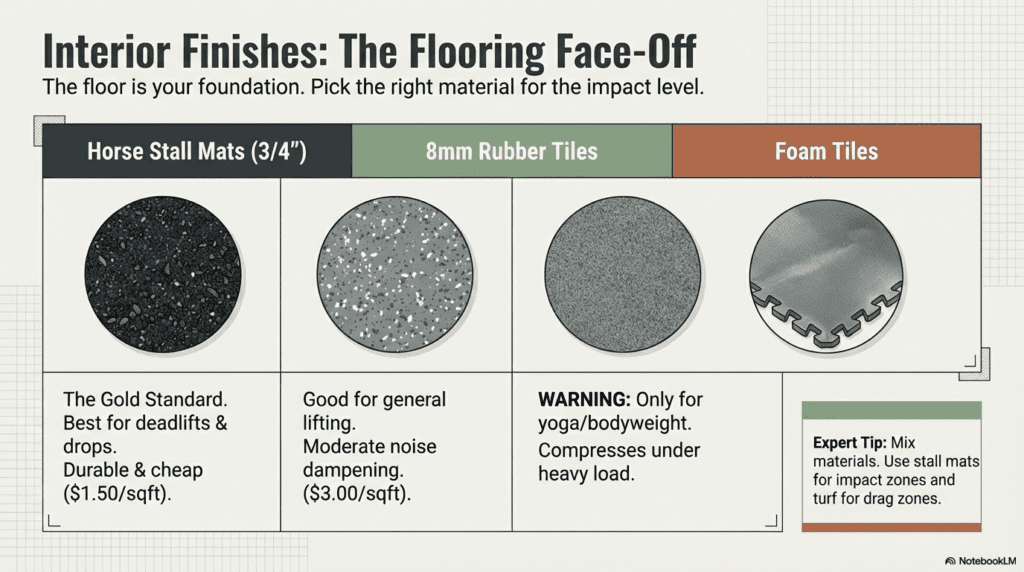
Your floor is your foundation—literally. Pick wrong, and you’ll deal with noise, odors, or even damaged subfloors.
Here’s how top materials stack up:
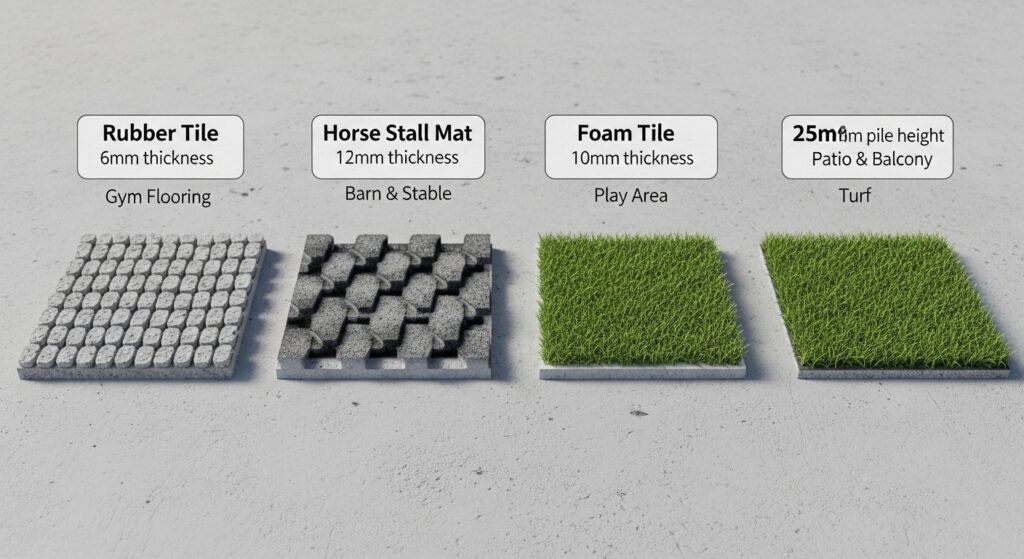
Material | Best For | Thickness | Cost/Sq.Ft | Noise Dampening |
|---|---|---|---|---|
8mm Rubber Tiles | General lifting, cardio | 8mm | $2.50–$4 | Medium |
¾” Horse Stall Mats | Deadlifts, heavy drops | 19mm | $1.20–$2 | High |
Interlocking Foam | Bodyweight, yoga, rentals | ½” | $1–$2 | Low |
Artificial Turf | Sled pushes, battle ropes | 1.5” | $3–$5 | Medium |
🧪 Material Science Note: Rubber absorbs impact better than foam—but cheap rubber smells for months. Look for low-odor, vulcanized rubber (e.g., Rogue or Titan).
💡 Pro Combo: Use horse stall mats under your rack (for drops) and foam or turf elsewhere (for comfort and zoning).
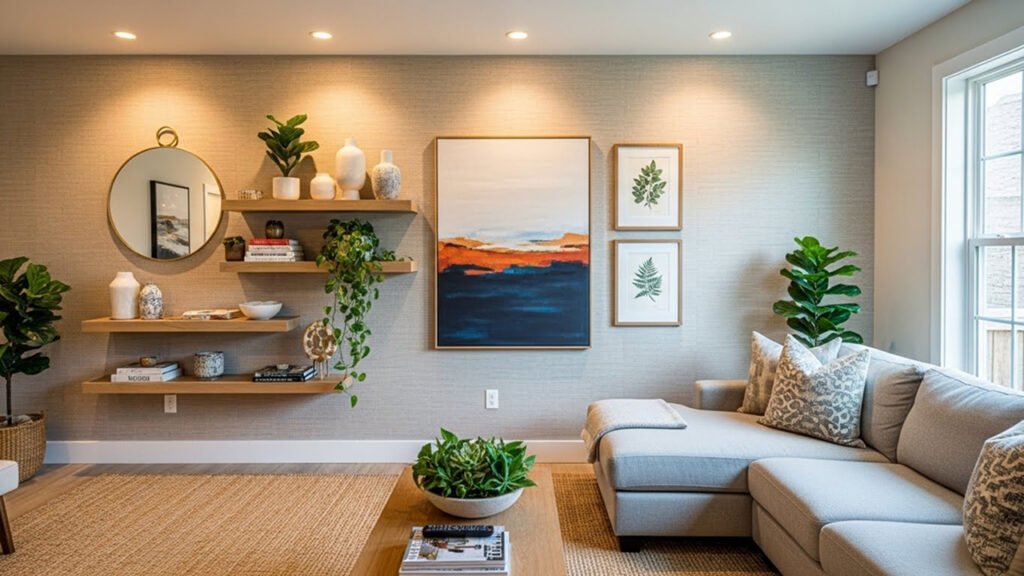
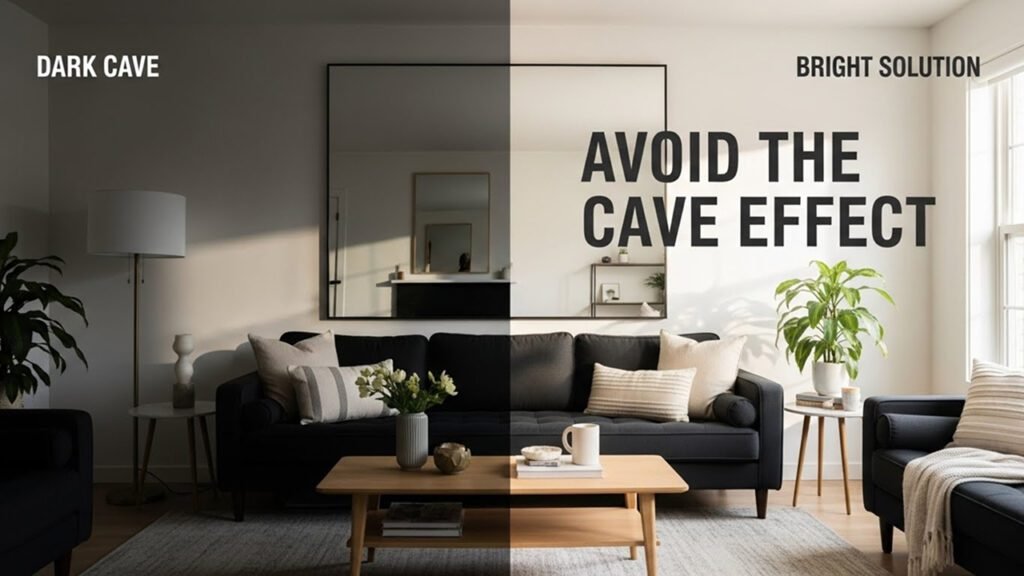
Lighting, Color & Mirrors: Boost Mood and Form
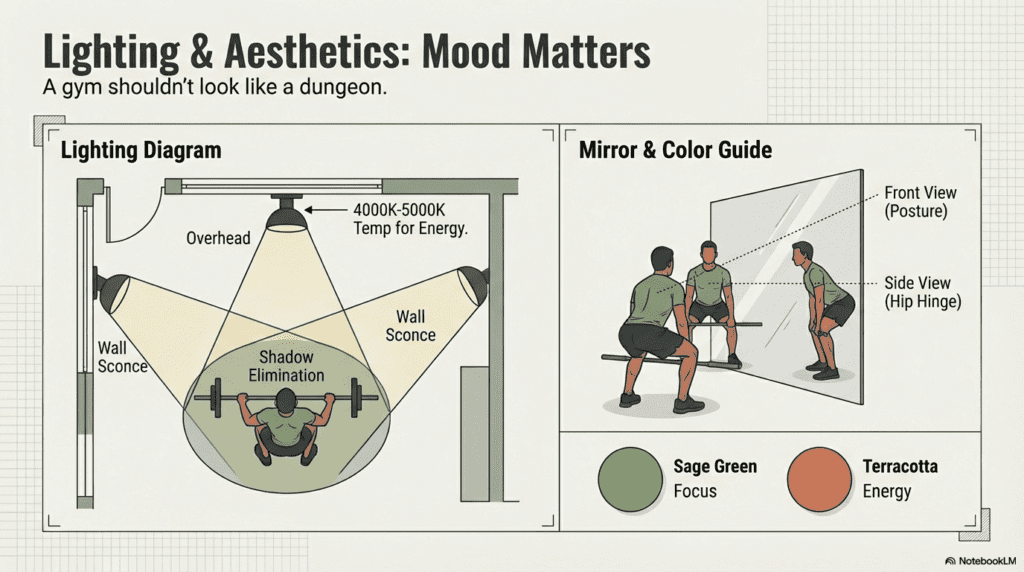
Lighting isn’t just about seeing—it’s about energy and focus. And mirrors? They’re not just for selfies.
Lighting Guide:
- Color Temperature: Use 4000K–5000K (cool white) for high-energy lifts.
- Layering: Overhead + wall sconces = zero shadows during squats.
- Smart Bulbs: Schedule “warm down” lighting (2700K) post-workout for recovery.
Mirror Placement:
- Front Wall: For checking squat depth and posture.
- Side Wall: Critical for deadlift form (watch hip hinge).
- Avoid: Behind you—creates disorientation.
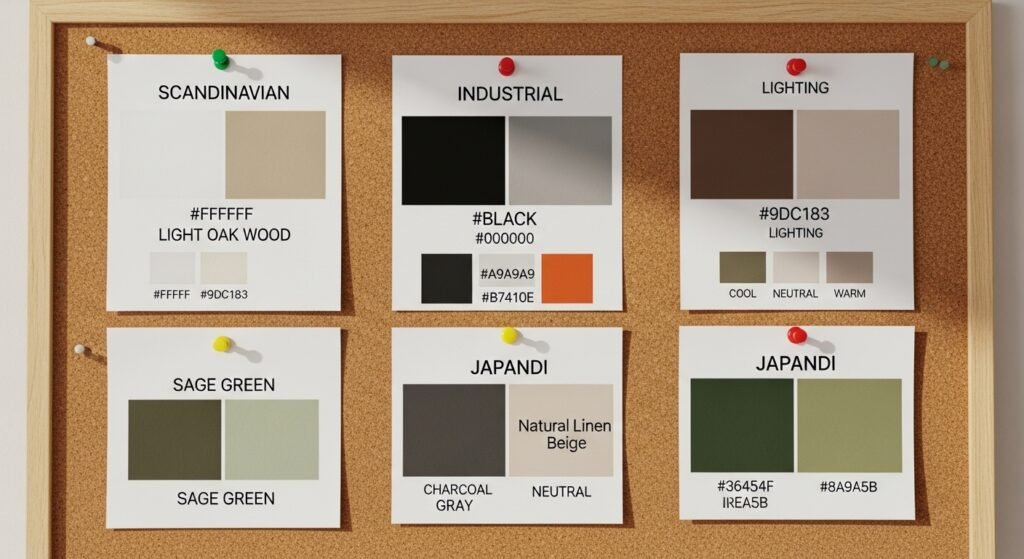
Color Psychology:
- Energetic: Terracotta (#e07a5f), deep green (#3d5a45)
- Calm Focus: Sage (#8a9b6c), slate blue (#5f7a8c)
- Neutral Base: Warm white walls (#f8f6f0) keep space open.
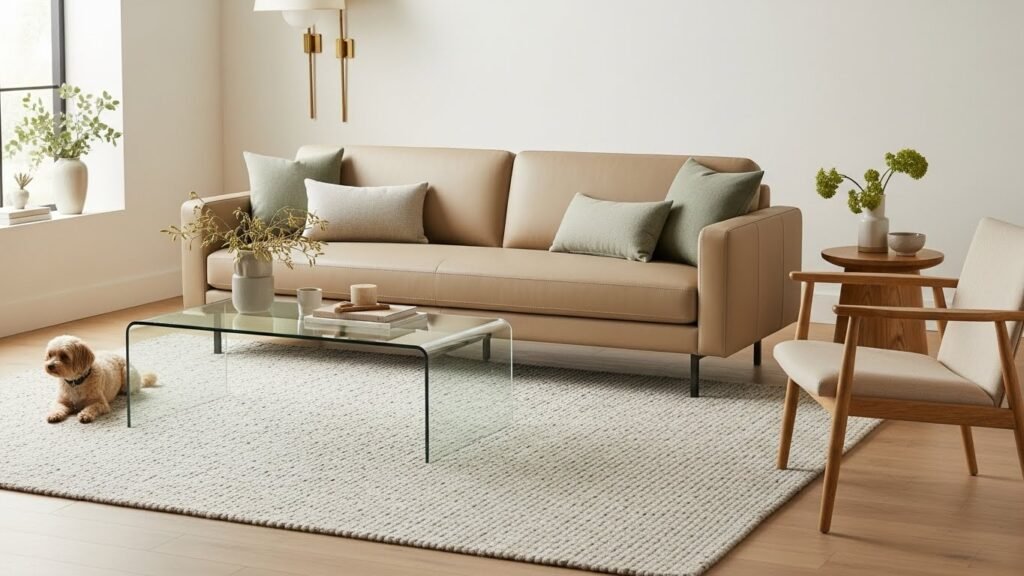
🎨 Styling Tip: Match your gym to your home’s palette. A black rack in a Scandi living room? Add wood shelves and woven bins to soften it.
Silence the Noise: Acoustic Solutions for Apartments & Shared Homes
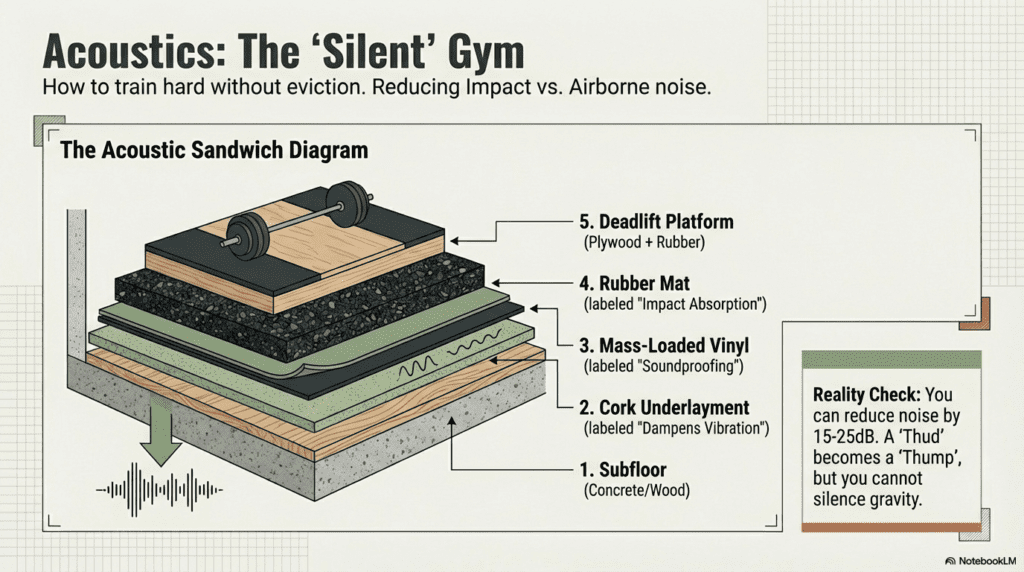
Dropping weights at 6 a.m. in an apartment? You’ll get complaints—or worse, eviction.
But you can train hard without disturbing others. Here’s how:
Noise Reduction Toolkit:
- Underlayment: 2mm cork or mass-loaded vinyl under mats ($1/sq.ft).
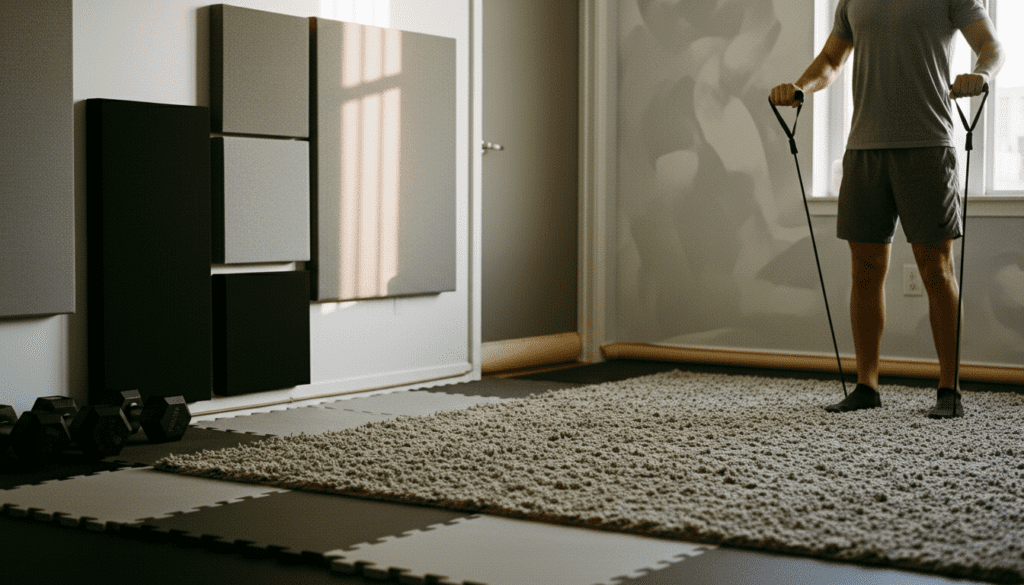
- Acoustic Panels: Mount on walls near impact zones (absorbs mid/high frequencies).
- Door Seal Kits: Block sound leakage ($20).
- Rugs + Curtains: Heavy textiles reduce echo and airborne noise.
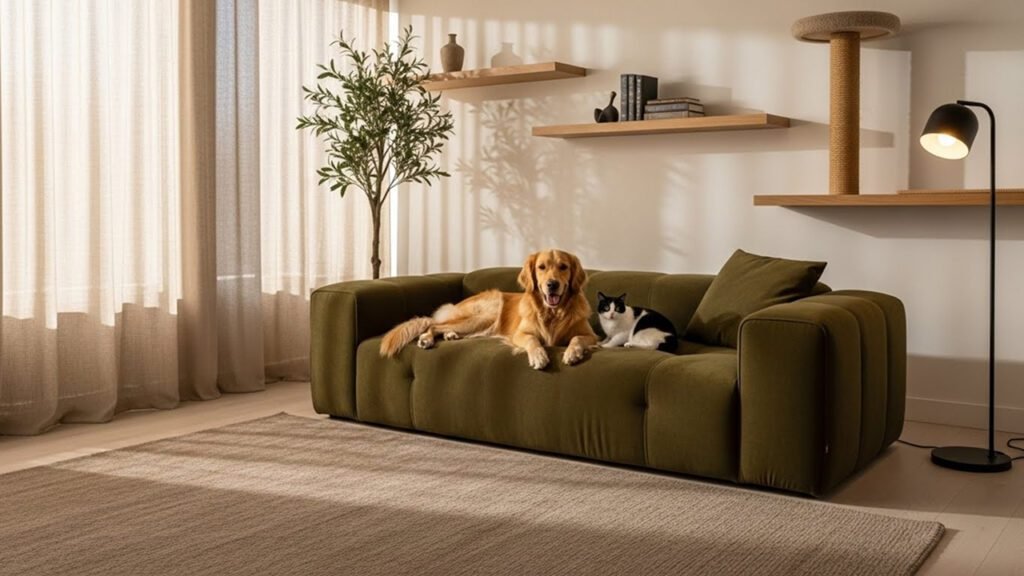
If you share your space with pets and weights, consider pairing acoustic panels with pet-safe, low-pile rugs that absorb sound and resist fur buildup—learn more in our guide to best pet-safe modern living room decor ideas.
🔇 Realistic Expectation: You can reduce noise by 15–25 decibels—enough to turn “thud” into “thump.”
🏙️ Apartment Hack: Train during daytime hours, use deadlift platforms with rubber layers, and avoid slam balls or box jumps.
Execute Your Plan—Week-by-Week Setup Checklist
You’ve got your room, budget, and design. Now it’s time to build it—without burnout.
Most people try to do everything in a weekend. Result? Half-finished floors, misplaced racks, and gear buried under boxes.
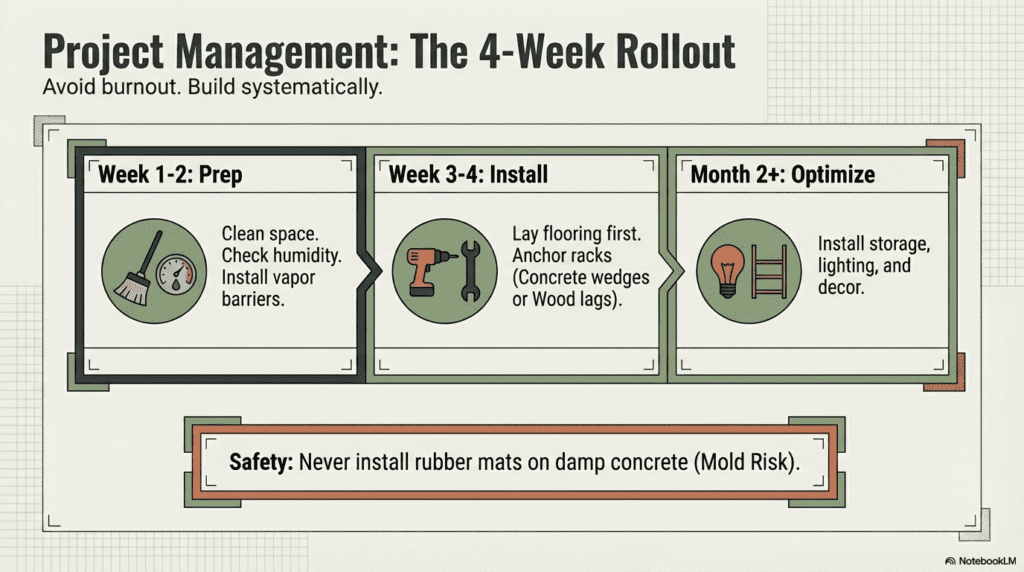
Instead, follow this realistic 4-week rollout plan. It’s designed for busy people who want a functional gym fast—but built to last.
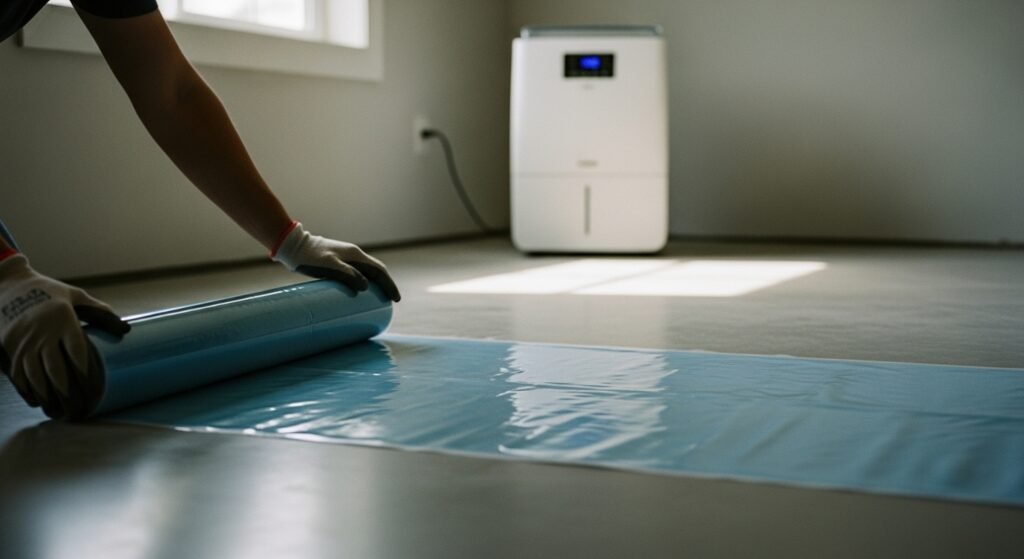
Week 1–2: Prep the Space (Clean, Reinforce, Ventilate)
Goal: Make the room safe, dry, and ready for heavy use.
Action Steps:
- Clear & clean: Remove all debris; wash walls/floors.
- Check humidity: Use a hygrometer. If >60%, add a dehumidifier (critical for basements).
- Reinforce subfloor (if needed): Add ¾” plywood over joists for upper-floor gyms.
- Install vapor barrier (basements only): 6-mil poly sheeting under flooring.
- Verify electrical: Ensure dedicated 20A circuit if using treadmills or saunas.
⚠️ Skip This = Regret: Installing rubber mats directly on damp concrete breeds mold. Always use a vapor barrier.
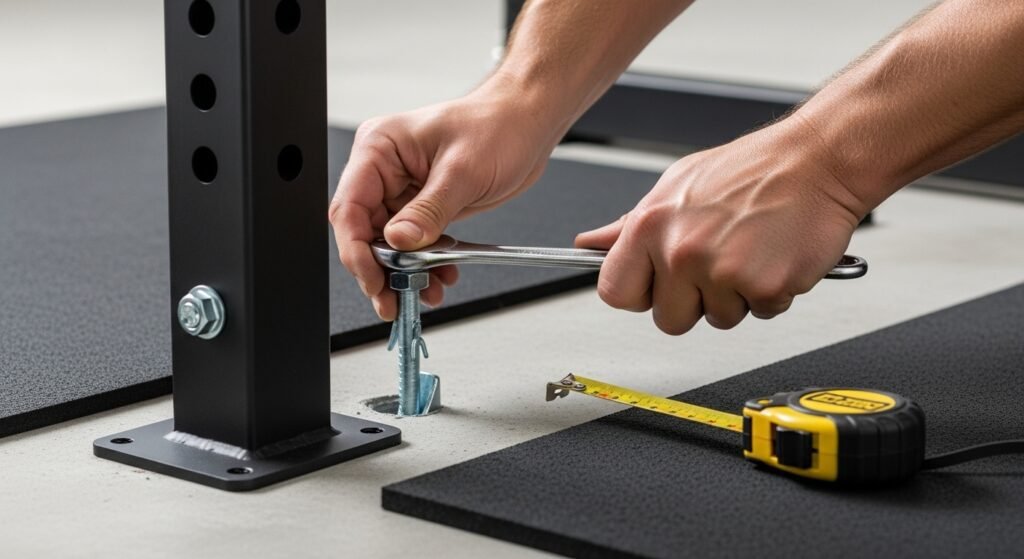
Week 3–4: Install Flooring & Anchor Heavy Gear
Goal: Create a stable, safe surface that protects your home and gear.
Action Steps:
- Lay flooring: Start from center; stagger seams.
- Anchor power rack: Use wedge anchors for concrete, lag bolts + washers for wood.
- Build deadlift platform (optional): 4’x8’ plywood base + horse stall mats on top.
- Test stability: Shake rack—if it wobbles, add wall brackets.
🔩 Pro Tip: Leave 1–2 inches between mats and walls for expansion and cleaning.
Month 2+: Add Storage, Lighting & Personal Touches
Goal: Turn your gym from functional to inspiring.
Action Steps:
- Install wall-mounted storage: Pegboards, shelves, or slatwall for bands, bars, towels.
- Add task lighting: LED strips under shelves or track lighting above zones.
- Control odors: Use activated charcoal bags or HEPA air purifier.
- Personalize: Motivational quote, plant, or color-coordinated gear.
🌿 Odor Hack: Sprinkle baking soda under mats monthly. Vacuum weekly.
-
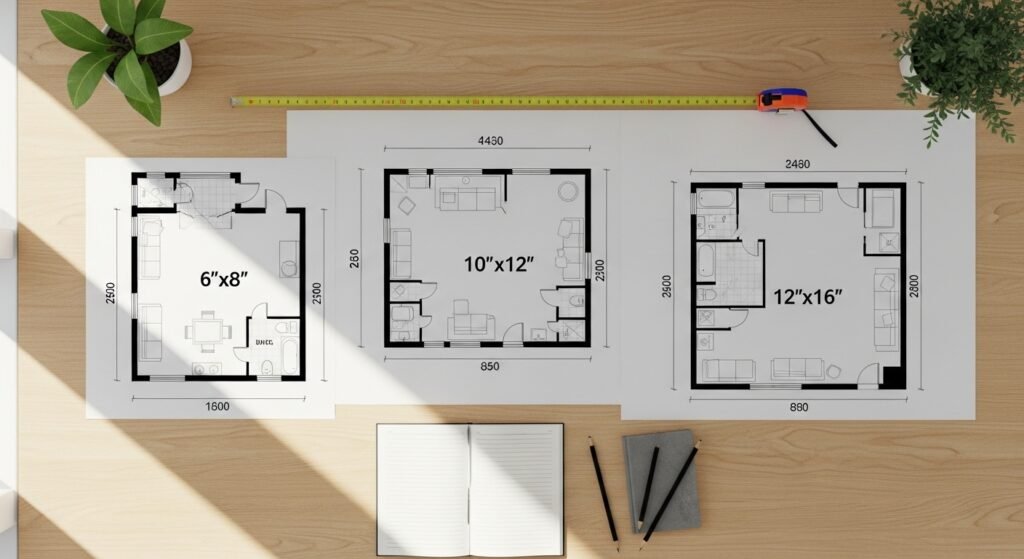
What’s the smallest space I can use for a functional home gym?
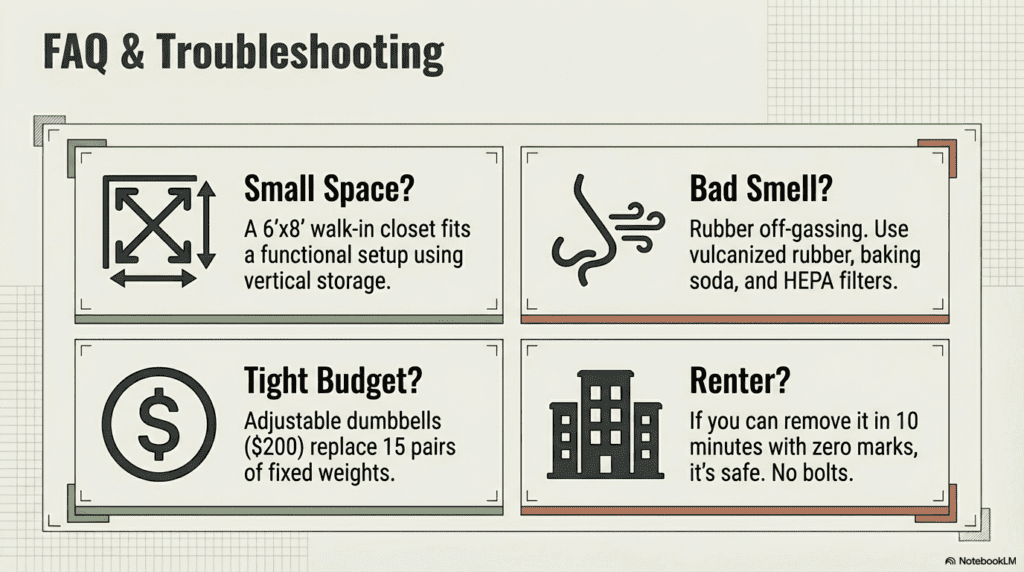
You can build a fully functional home gym in just 6’x8’—about the size of a walk-in closet. Focus on vertical storage, foldable gear, and multi-use tools like resistance bands and adjustable dumbbells. Prioritize exercises that don’t require lateral movement, like presses, rows, and bodyweight squats.
Just like a well-designed studio apartment, a tiny home gym thrives on smart zoning and scale. For more space-maximizing tricks, see our full guide on how to decorate a small living room.
📏 Real Example: A NYC teacher built a $600 gym in a 6’x7’ closet using a door pull-up bar, wall-mounted rack, and foldable bench. It fits—and gets used daily.
-
How do I design a home gym on a tight budget without sacrificing quality?
Start with versatile, durable basics: a mat, resistance bands, and adjustable dumbbells under $300. Skip gimmicks (like vibration plates) and invest in gear with proven longevity—e.g., steel racks over plastic all-in-ones. Buy used from trusted sellers, and phase purchases over 3–6 months to avoid debt.
💰 Smart Move: A $200 set of adjustable dumbbells replaces 15+ fixed pairs—saving $500+ long-term.
-
Can I build a home gym in a rental apartment without damaging floors?
Yes—if you avoid permanent modifications. Use interlocking foam tiles (not rubber), freestanding racks, and door-mounted pull-up bars. Never bolt into floors or walls without landlord approval. For noise control, add thick rugs and train during daytime hours.
🚫 Landlord-Friendly Rule: If you can remove it in 10 minutes and leave zero marks, it’s renter-safe.
-
What flooring is best for deadlifts and high-impact workouts at home?
For deadlifts, ¾” horse stall mats are the gold standard—they absorb impact, protect concrete, and cost under $2/sq.ft. For high-impact cardio (jumping, plyos), use 8mm vulcanized rubber tiles with interlocking edges. Avoid thin foam—it compresses and offers no drop protection.
⚠️ Warning: Cheap rubber smells for months. Choose low-odor, commercial-grade mats from Titan or Rogue.
-
How do I soundproof a home gym in an upstairs room or shared living space?
You can’t fully soundproof, but you can reduce noise by 15–25 dB—enough to keep neighbors happy. Use thick rubber mats over cork underlayment, add acoustic panels on walls, seal door gaps, and avoid dropping weights. Train during daytime, and choose low-impact alternatives like bands or rowing.
🤫 Key Insight: Impact noise (drops) travels through structure; airborne noise (grunts) travels through air. Treat both.
People Also Ask
How do I create a step-by-step plan for designing a home gym on a tight budget?
Start by measuring your space and defining fitness goals. Prioritize versatile, multi-use gear like adjustable dumbbells and resistance bands. Phase purchases: begin with a mat and bands ($50), add dumbbells ($150), then a rack later. Use free floor planners online, and always anchor heavy gear safely. Avoid impulse buys—build over 3–6 months to stay under $500.
What are affordable home gym equipment options suitable for small spaces?
For tight spaces, choose foldable or wall-mounted gear: adjustable dumbbells (5–50 lbs), door pull-up bars, resistance bands, and compact benches. Skip bulky machines. A jump rope, yoga mat, and suspension trainer deliver full-body workouts in under 4 sq ft. Store gear in bins or on pegboards to keep floors clear and maximize usable space.
Where can I find budget-friendly home gym flooring solutions?
Buy interlocking foam tiles ($1/sq.ft) for apartments or light use. For garages/basements, ¾” horse stall mats ($1.20/sq.ft) from Tractor Supply or Amazon offer durability and noise reduction. Look for “low-odor rubber” to avoid chemical smells. Secondhand gyms often sell leftover tiles—check Facebook Marketplace or r/garagegym for deals.
Which online retailers specialize in home gym gear for less than $500?
Amazon, REP Fitness, Titan Fitness, and Walmart offer complete starter kits under $500. REP’s “Budget Home Gym” bundles include racks, bars, and plates. Titan’s T-2 rack + barbell combo fits most budgets. Also check Overstock, Dick’s Sporting Goods (clearance), and Play It Again Sports for refurbished gear with warranties.
What is the best way to prioritize equipment purchases when building a home gym on a budget?
Follow this order: 1) Flooring (foam/rubber), 2) Adjustable dumbbells, 3) Pull-up bar, 4) Bench, 5) Power rack. Skip cardio machines early—use bodyweight or jump ropes. Focus on strength first: it builds foundational fitness with minimal gear. Always buy used racks/barbells; new for hygiene-critical items like mats.
Can I get recommendations for versatile home gym machines that save space and money?
Avoid single-function machines. Instead, choose: adjustable dumbbells (replace 15+ pairs), power racks with pull-up bars, and cable machines with dual pulleys. The Bowflex SelectTech 552 or Titan T-3 Folding Rack offer max utility in minimal space. For cardio, a rower (like Hydrow Rower Refurbished) folds and works full-body—better ROI than treadmills.
How to set up a home gym using secondhand or refurbished fitness equipment?
Shop r/garagegym, Facebook Marketplace, and Play It Again Sports. Inspect racks for bent steel, barbells for warped shafts, and mats for odor/mold. Test moving parts on treadmills/rowers. Negotiate 30–50% off retail. Clean thoroughly with disinfectant. Prioritize steel items (racks, bars)—they last decades if structurally sound.
What brands offer durable yet affordable dumbbells and kettlebells for home use?
For dumbbells: Bowflex SelectTech (adjustable, space-saving), CAP Barbell (fixed, under $1/lb). For kettlebells: Rogue Fitness (competition-grade), Titan Fitness (budget cast iron). Avoid plastic-coated cheap sets—they chip and smell. Look for solid steel cores, smooth handles, and lifetime warranties on adjustable models.
Where to buy compact cardio machines at discounted prices?
Check NordicTrack, ProForm, and Sole Fitness outlet sections for certified refurbished treadmills/rowers. Amazon Warehouse offers open-box deals. Costco occasionally runs $399 treadmills. For true compactness, consider the AssaultRunner Curve Treadmill (no motor, manual) or Stamina ATS Air Rower—both under $400 and foldable.
How to design a home gym that fits in a garage without overspending?
Use existing concrete—add 4’x6’ horse stall mats ($80) only where you lift. Bolt a basic power rack to the floor. Skip walls; use slatwall panels for storage. Ventilate with a $50 box fan. Paint floor with epoxy for easy cleanup. Total cost: under $600. Keep it functional, not fancy—garages thrive on utility, not decor.